Photo Editing/Creation Toolsremove.bg Remove Background Images from Photos Voki.com Students can use this site to create avatars and add audio clips. This would be a fun method for them to use to turn in assignments, create movies/characters/stories, and to have them discuss classwork. Students do NOT have to create a username/profile and they can still share their characters via email or a tiny URL link. Student/Class Discussion ToolsBackchannelchat.com Back Channel Chat is a new alternative to Today'sMeet. This is a site that allows for a controlled online discussion platform. The teacher creates a chat room and gives controlled access to the students so they can discuss an issue online. This is great for kids who are quiet in class and it gives the teacher a record of what was "said" in class. Hypothes.is Hypothes.is is a web annotation tool. Lesson Plans/CurationsGlobalOnenessProject Global Oneness Project is a source that provides digital information (photos, videos, etc) and lesson plans for that topic. All the Google ThingsI got to go to 2 sessions with Eric Curts. You can find all of this info AND MORE at his blog: http://www.controlaltachieve.com. The two sessions I went to included "Hipster Tools" (things you might not already know about Google) and "Beyond the Slideshow."
Here are the links to his blog posts: Hipster Resources Beyond the Slideshow
0 Comments
OER (or Open Educational Resources) is a new term in education. It basically takes the idea of content that has been created for schools and allows others to access it. This includes items such as primary documents, creations that are licensed under creative commons, and educational materials developed using federal grant money. Great, but why should you care about this? BECAUSE IT IS FREE AND AVAILABLE FOR YOU TO USE. Also, because these are things you AND YOUR STUDENTS can use without worrying about copyright issues. So, today I will cover two main aspects within the #OER discussion. 1. Finding images/graphics for you and your students to use 2. Using #OER resources to develop and supplement your curriculum GraphicsWhile I know that most of you would never send a kid out to just screenshot an image or item they found on a generic google search, that doesn't mean the kids aren't doing it. If you or your students require images for a project, please use the following sources: Flaticon This is a site that allows you to choose clip-art style graphics, and also edit them to your needs (changing colors, etc) without requiring a sign-in. There are some paid items, but the VAST majority are free. The Noun Project Similar to Flaticon, this is a site where you can get graphics without needing a log in. There are not as many choices as Flaticon, but still plenty of variety. Plus, there are some cool graphics/options. Try searching the "Lego" one for fun. Pixabay This is great resource for you to use when finding photographs for class projects. The first line of results is always advertisements, but the rest are great to use with class. Be aware that this site might be blocked for students. Photos For Class This is another great resource for students to use. I have this linked/embedded on my Research page as well. It is a fantastic option for kids to use on class projects. OER CurriculumWhile there are many sites out there that provide OER resources, the main I am going to focus on today is OER Commons.
This site allows users to search by content area, standard, level, and key word. There are also HUBS that have been created by specific educational institutions. Nebraska's Dept of Ed is working on one; it will be available hopefully sometime this summer. Until then, Iowa and Pennsylvania are two good examples that we will look at today. As with anything, you might have to do a search or two before you find something you want to use. Also, you might find an idea for something that you will still have to remix and recreate, or you might find something that is perfect for you to use "as-is." There are also other sites that have full curriculum already developed-we will look at those more at a later date.
We're talking all things Google Classroom and Formative Assessment today!
(for those of you who have NOT gotten started with Classroom, please check out these resources for background info, help getting started, and tips on setting up classes: Ditch that Textbook-The Google Classroom Quick Start Guide Or, check out this YouTube tutorial (yes, the narrator is Amy; no, it is not me):
Also, here are a few tips on what to do with your Classrooms to get them ready for next year (isn't it crazy to think that way???)
Alice Keeler-Cleaning Up Classroom for the Summer Now, we will cover some of this in our session on Thursday, but this way you also have some additional resources to go back to if you have questions and can't find Matt or me. When students submit an assignment, they can create something from the Google Products Drive (doc, sheet, drawing, etc) OR they can upload any type of file they have created in other products. In the session we showed you how to use Photobooth to have the kids upload a video recording of themselves. Some other options: -Video Reflections -Video Summaries -Annotated Pictures/Text -Using Google Forms for Quizzes (it's a setting . . . see Matt or Amy with questions) -Using Google Forms as an exit ticket -Video Recordings of Speeches/Presentations for students to practice with and reflect on This is just a SMALL SNIPPET of everything you could do with Classroom. There are staff members on every team who are already trying this in their classrooms, so feel free to ask them questions if you are interested in seeing how it would work for your specific students.
The Hour of Code is nearly upon us! For some general background information check out THIS LINK. The goal for Hour of Code is simple: give all kids, everywhere, the opportunity to complete one hour of coding. Here at ACMS, we want to give you some info about how we can do this, what it would look like, and resources you can use.
How this would look at ACMS: Matt and I would be more than happy to come to your class or host you in the library to complete hour of code activities. If you would like us to help out, please let us know! We will gladly do some background/overview info and then be on hand as the kids go through the activities to help troubleshoot and problem solve. A word to the wise though: it's best to let the kids figure out the challenges on their own. That is one of the main benefits to doing coding-while it teaches engineering and practical computer skills, it ALSO teaches problem solving, creative thinking, and encourages collaboration. You could also have hour of code activities in your room-please let us know when you would like to do this and we could help make sure you get devices. OR you could do pen and paper coding activities. See these links/sources for ideas: Code.org Graph Paper Coding CS Unplugged To give you a sense of what coding looks like, here is an example from Code.org:
For beginners, block coding is easier. If you want, you can also code using javascript.
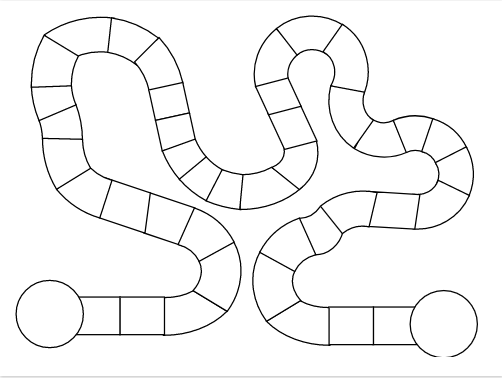
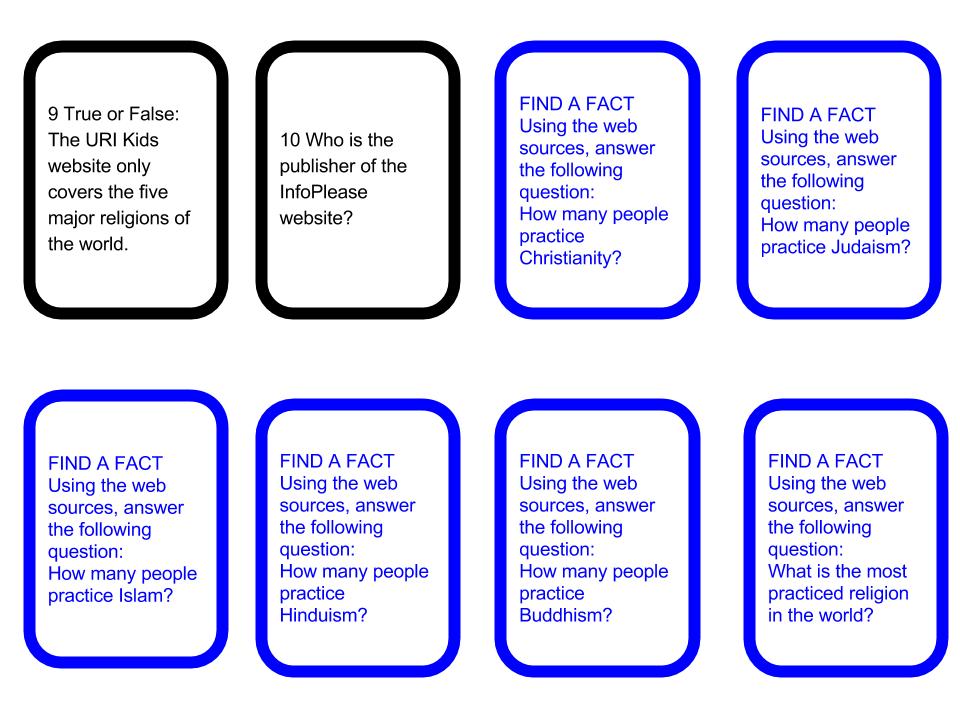
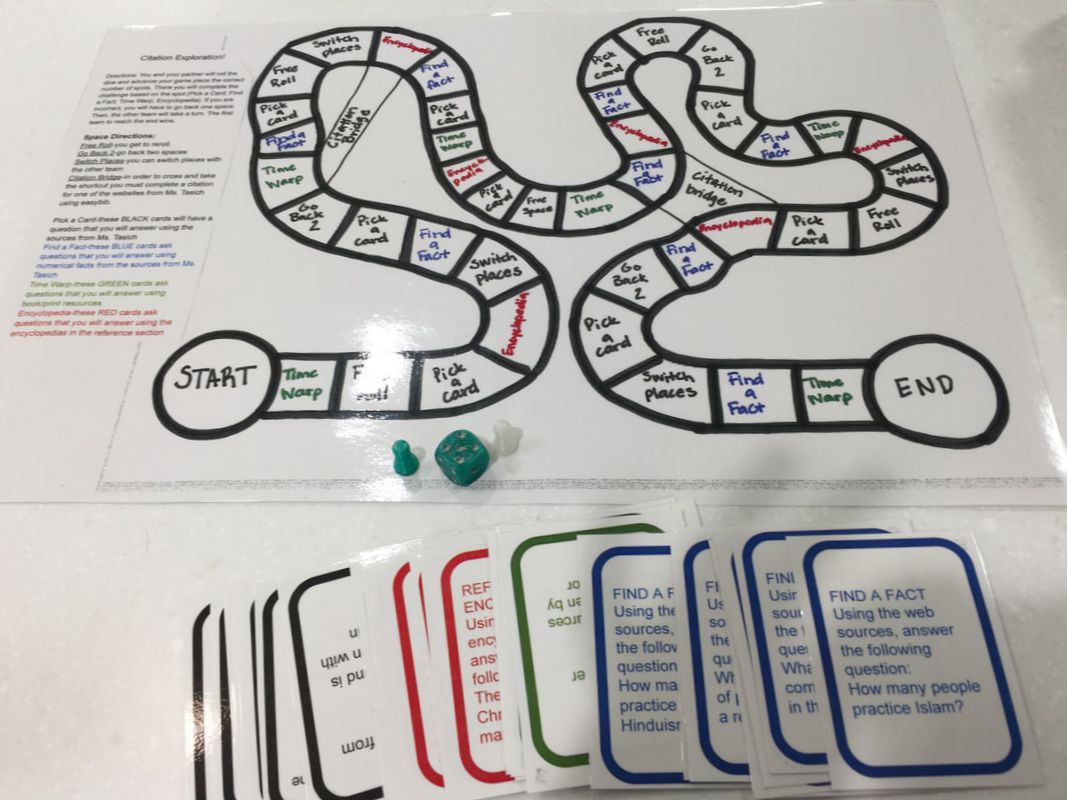
Now, for some resources: One activity we found was from Google where you can design a new logo. Use THIS LINK to find that activity. Code.org is a GREAT source of information, but it is not the only option. In addition, Code Academy is another option. If you are using the iPads, Lightbot, Tinker, and the Swift apps are all fantastic resources. If you have a student who has already gone through some coding activities, or who is inclined towards this type of work, set them up on Swift. It is a great extension. Finally, Middle School Curriculum, is a collection of resources/lessons from Code.org that ties to specific curricular areas. For more information, or to see WHY I decided to try gamification, along with some resources, check out Part 1 of this series. Today's post will cover the actual process I went through in making the games. I created a digital breakout for the 8th graders and a traditional board game for the 7th graders. The 8th graders instruction was focused on evaluating sources since they were going to be finding research on their own. We went over databases and keywords and the digital breakout had topics focusing on comparing two sources (database result and web result), determining if something is fake news, setting parameters on advanced searches, and finding information on an author of a website. These skills were all things that I had noticed the students struggling with on past research projects. When I first started with this project, I wanted to do an escape room of sorts with QR codes and stations around the room. I initially planned on having kids use the iPads to scan the codes and fill in the Google Form, but after looking into it and realizing the split screen option wouldn't work as well as I wanted it to, I switched and decided on a digital breakout utilizing Google Sites. To begin, I created a folder for each of the different stations/projects. These stations became different pages/tabs on the actual site itself. In each folder I put the Google Form for that page, the links I used, copies of PDFs, and any other info (pictures, sites, etc). Each page had a Google Form that asked questions relating to the material on that topic, and the submission screen on each Form gave a color code. This color code was used on the home page of the Site to unlock the final problem and "win" the game. HERE is the Google Site I created for this project (the overall storyline/theme was alien invasion). The 7th graders were using information we gave them (a collection of web sources, print materials, and encyclopedias found in the library) so they didn't need as much instruction on source evaluation. Rather, their lessons focused on using the materials provided and creating citations. For them, I created a board game. Before creation, I knew that I wanted them to have to answer a variety of question types, and solve a few "challenges." I used a template I found online (pictured below) and blew it up on the school's printer to fit an 11X17 piece of paper. After I printed one, I outlined the squares to make it darker and filled in the different spots. I had already decided on four different types of questions: Find a Fact, Pick a Card, Time Warp, and Reference. Each type of question had a deck of cards I made that had questions specific to it. Time Warp questions used printed materials, Reference used the encyclopedias, Find a Fact and Pick a Card both used the web resources we had curated for them. I created the game cards using Google Draw (see example below). Finally, the tech guy and I used the 3D printer to create dice and game pieces (in two colors) for each board game set. In the end we made enough for 6 games to be going at once, which equals out to about 4-5 people per game (2 teams). Below is a pic of a completed game set: For both games (the digital and the traditional) the hardest thing was coming up with what all I wanted them to get out of the game FIRST and then working backwards. This was not a project that you could complete the morning of, or do with just a random thought. There was a lot of planning involved, and I was glad to be able to create this for teachers. Working in the library gives me more flexibility in planning, so I am able to create projects like this more easily than a classroom teacher can on their own.
Part 3 of this series will deal with my thoughts AFTER the games were done and how the students responded. Stay tuned! This is the first post in a three part series about how I used gamification to teach/reinforce research skills in the library. This post will cover how I began, the process for gamification, and some additional sources on game-based learning and gamification. Part 2 will cover the actual creation of the games (a digital breakout and a traditional board game). Part 3 will cover how it went along with my reflections from the experience.
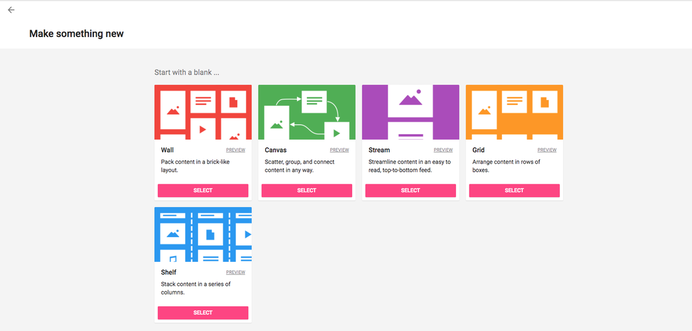
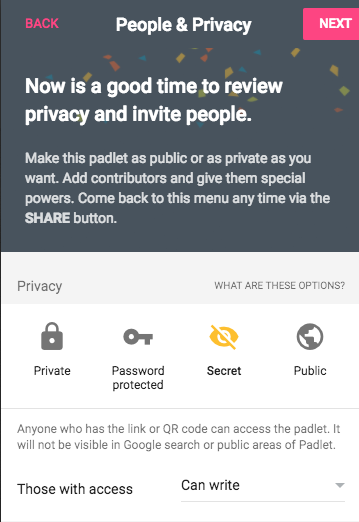
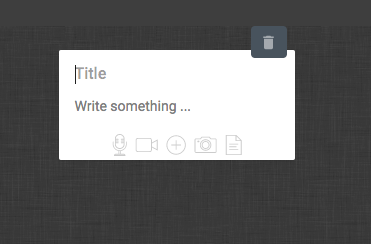
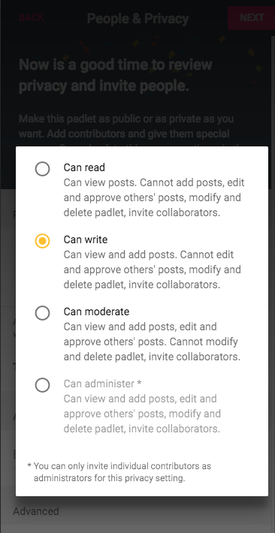
I had two teachers (7th grade Social Studies and 8th grade English) recently approach me about teaching research at the beginning of two different projects. The 7th graders were doing a unit on World Religions and the kids were going to create a poster/infographic with the information they found. The 8th graders were starting a unit on persuasion. They had already come in for an overview of using the library databases and the library website. They were getting ready to find sources on their own now. For both of these units, I knew I wanted to do something besides just lecture and showing websites/sources. They each had different end goals, especially considering the fact that the 7th graders were using sources we had already given them. Their instruction needed to focus on utilizing those sources and creating citations. The 8th graders were going to be searching on their own, so they needed to know how to evaluate the information they found. I decided to do a gamification of the information. For the 7th grades I wanted to create a traditional board game. For the 8th graders I wanted to have a digital breakout or escape room. With this in mind, I started searching for other sources/teachers/examples. The hardest thing about gamification or creating game-based learning opportunities in understanding how it is going to look at the end. This is definitely a time where you need to plan out what you want and work backwards. Some sources to consider: How to Gamify Your Classroom How to be as entertaining as a video game The Ultimate Guide to Gamification Digital Breakout Templates Breakout EDU-digital Padlet is a great resource for teachers to use in their classrooms that allows for discussion, interaction and participation from ALL students. The teacher creates a link, sets up the padlet (basically a background) and the students respond to a prompt with either a text, visual, or linked response. You do need to have an account, but this can be done through your google account, and you send the link of your padlet to the students (this could be easily done in Google Classroom). Then, you can control the access to the padlet. When you are ready to create, you can start from scratch or use a template. 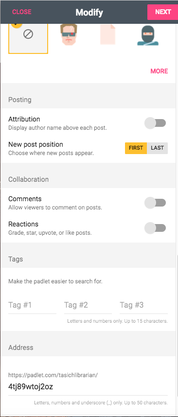 As you begin to create your padlet, you will have choices. Some things to think about are how your kids are going to respond and if you want their names to show with their post (I would encourage this) and if they can comment/respond to others. This would depend on what the assignment was and if there would be conversations back and forth. Also, at the bottom, you can see that it gives you the link for this padlet and that is what you would need to provide for the students so they can access it and respond. Next, you will need to determine privacy settings and how students are able to respond to the question/topic. Some ideas for how you could use this:
Reactions to a text Class discussion posts Notes over a topic/article Research stations/notes Collection of ideas/thoughts for a group project ALSO, you could do this with Google draw and text boxes. Just FYI. :) For more info, see these sources: Free Tech for Teachers: Uses for Padlet A Padlet ABOUT Using Padlet As always, any questions/comments, let Matt or myself know. We would be more than happy to help you with this if you are interested in trying it out in your classes. Hi all!
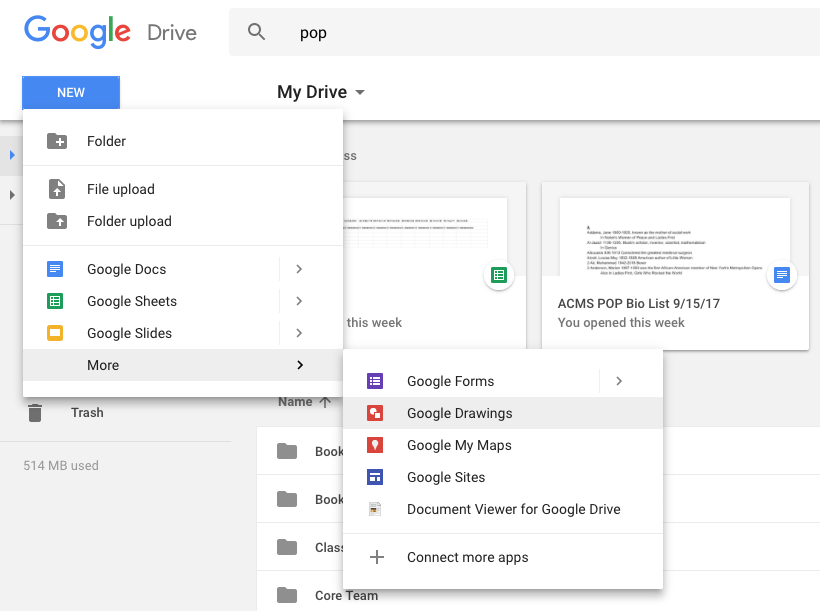
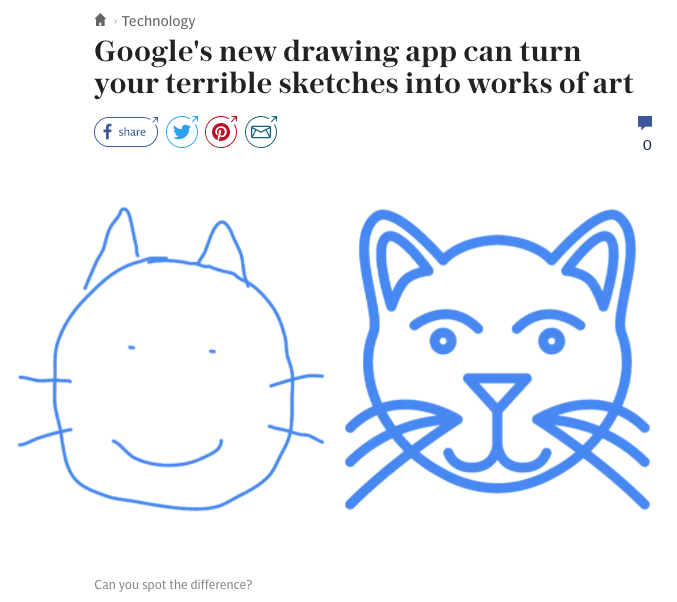
Today's "tech tip" is a compilation of resources you can use for tech inspiration or ideas. Some of these are from Mr. Moore and are resources he subscribes to, others are ones that I follow/use, and some are ones we found for specific content areas. General Info/Google Tips: EDU in 90 This is a YouTube playlist of short 90 second videos highlighting a tech tip or Google information (examples: Google Classroom updates, Digital Citizenship ideas) Google Classroom Training Center This site has helpful lessons/tips for how to use Google Classroom more effectively. Eric Curts @ericcurts Innovative Teaching: George Couros @GCuoros The Innovator's Mindset Dave Burgess @BurgessDave (#tlap) Teach Like a Pirate Alice Keeler @AliceKeeler Lots of info about Google Classroom Content Specific: Reading: Pernille Ripp @pernilleripp Donalyn Miller @donalynbooks (Nerdy Book Club; #titletalk) English: NCTE Middle Grades Shawna Coppola @shawnacoppola Math: Teaching Blog/Resource Alice Keeler-she was a Math teacher and has great resources Science: Lesson Plans/Resources Science Websites Social Studies: Ben Brazeau @Braz74 #sstlap iCivics @icivics I have included their Twitter names and relevant hashtags. If you are interested in learning more about using Twitter to grow your Professional Learning Network, let Matt or me know. We'd love to help! Also, follow us: @matt_moore80 and @amytasich and #acmsmedia. ***I will do a separate post/email about Specials Areas teachers.*** Google drawing is one of the little known gems of the G-Suite. Most people are pretty familiar with Docs, Drive, Slides, Sheets, Forms, etc, but not everyone uses Drawing. To open up Google Drawing, follow the steps below: From here, you can insert images, shapes, text boxes, etc. You can upload an image you already have or search the web from within Google Drawings. HERE is a link to a blog post showcasing how to use Google Drawings to create fill in the blank activities for kids to do when labeling a cell. You could use this with charts, maps, graphs, plot diagrams, scenes, anything really. In addition, you could use Google Draw for infographics. Here are two blog posts (ditch that textbook and Alice Keeler) to give you ideas and insights for how to use this tool. Also, another option that Google has put out is autodraw.com. With this site, users can hand draw various items and Google will enhance it. HERE is a blog post explaining this site and its features. This is helpful for both students and teachers who are creating online or digital presentations and who need extra help with the artwork (hint-this is almost always ME; I always need help with the artsy stuff). As always, if Matt or I can help you with any of these tech ideas, please let us know. I'd be more than happy to talk to you or your classes about using these products during a unit or lesson. With these tools, students can feel more confident in their presentations and visual aides.
We did not have a chance to meet with all of the teams this week, but we still wanted to send out a tech tip for everyone. Today we are going through how to share in Google Docs and some of the benefits to using this part of Docs. When you share Docs within your teams or departments, you have an easy way to collaborate. Google Docs gives you the ability to keep up with the updated drafts of handouts and materials without having to revert to the classic file names of "FinalFINALACUTALFINAL1AFORREALFINAL.docx" :)
Matt and I would STRONGLY encourage you to begin using Google Docs to create and modify your handouts, projects, and team materials. You will not run out of storage space using Google Drive and you will be able to access these items from anyplace that has internet access (meaning you don't have to have one specific machine or device with you at all times). Here is a video detailing how to share within Google Docs and the different levels of access. Also, here is a helpful website that covers some of the basics of Google Docs. Also, for those of you who are used to using Microsoft Word, there is a helpful PDF/handout within this website that showcases the differences and similarities between these two platforms. As always, please let Matt or myself know if we can help you with this transition. |
Amy Tasich archives
January 2021
Categories
All
|
 RSS Feed
